|
Based on
feedback I've received, I thought I'd share some
thoughts about lighting. (Yes, I do read &
respond to your messages).
Lesson One --
What You Are Really Doing: You can't throw flour, sugar, eggs, &
milk into an oven and expect a wedding cake to come
out. You can't dump lumber & nails &
sheet rock & wires & pipes off the back of a
truck and expect it to land into a dream house
configuration. By the same token, you can't
expect to take a model, turn on all the lights, and
expect a top quality picture. When you make a
photograph, you are doing nothing other than recording
light hitting film, and your effort should be devoted
to crafting & selecting the best light
possible.
|
|
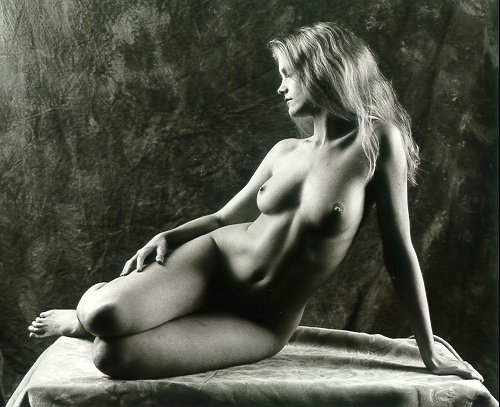
| Lesson
Two -- Shadows: Shadows are extremely
important -- they define the shape of
the object/model, and they contribute a
sense of three dimensions to the image.
I like to craft images to include, or
even emphasize, shadows. |
|
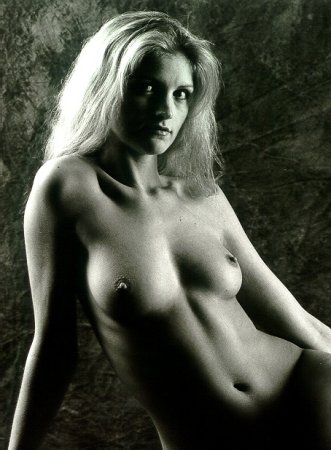
| Lesson Three --
Multiple Light Sources:
Using a large soft box (like I did with these
pictures), you get a wonderful, soft light
similar to window light. Now, sometimes
that's enough (see "Living
Room" and "After
The Shower" from Leona's Soft
Evening Light sitting). But take a
close look at those one-light images -- in
particular, look at the side of the model that
is opposite from the light source -- since the
light comes from the side, the far side of the
model is in shadow, and typically the
background behind the model on that side is
insufficiently lit to define the edge of the
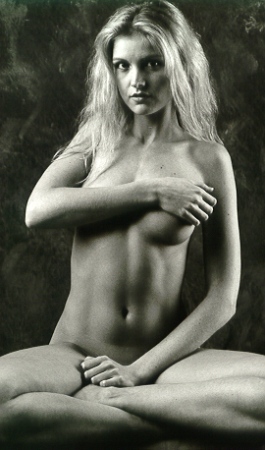
figure. So, I like to use at least two
light sources. A main light (in this
case, a large soft box to the left of the
camera) and some kind of fill light to place
some highlights on the far side of the
model. In these pictures, the fill light
is a large strip light, a soft box that is six
feet tall but only about 2 feet wide -- this
light is placed a bit behind the model. Try to
imagine what this picture would be like
without the fill light -- I especially like
the balance of light on Leona's left
breast.
An alternative:
although we didn't do it this time, sometimes
it's enough to throw the fill light on the
background, making the shadowed side into a
silhouette. (See this
favorite image from Veronica's
sitting).
|
|
|
|
|
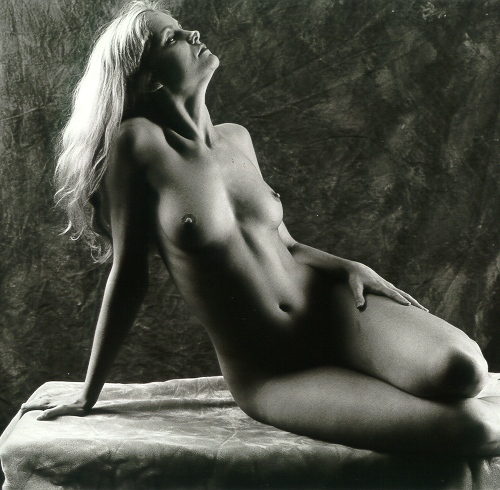
Lesson
Four --
After setting up the light, pay
attention to details. My sittings
are slow paced. There's this
period of high concentration for me when
I set up the lighting, and I am
fortunate that Leona is patient with
me. During this time, I'm moving
the lights, checking its effect, moving
them again, calculating exposure, taking
care to focus (my eyes aren't as good as
they used to be). The things I'm
thinking about:
- I arrange
for a few wrinkles in the cloth
covering the table.
- I made sure
that there was a sufficient lighting
difference between Leona and the
background.
- Although she
is sitting comfortably, Leona's pose
is critical -- does her left
shoulder look comfortable, how open
should her chest be, should Leona
turn a little to optimize the effect
of the lighting on her left nipple,
do I care that Leona's pelvis is in
shadow, etc.
|
|
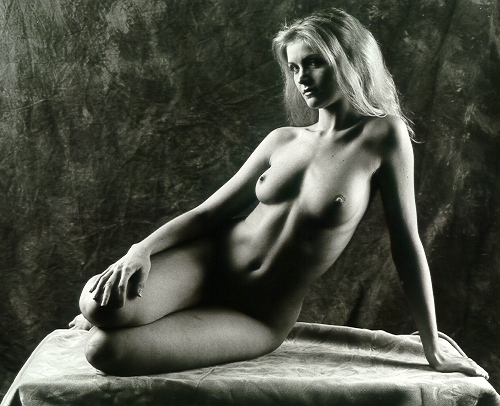
| Lesson Five --
Variations: I like to expose one or more
whole rolls for each lighting setup (10
exposures per roll), and I want to see some
variation in the images when I develop the
film. In this particular lighting setup,
there is balance -- there are two soft boxes
on either side of the model, and each soft box
is somewhat behind her. So, I ask Leona
to provide me a mirror image pose.
While at first glance
these images are almost the same as the
previous ones, they do have some subtle
differences. Note Leona's right hand and
her right shin -- both are overexposed in this
image. Now I can go back & correct that if I print
this image again, but you've got to pay
attention to such details. Something I
can't correct -- Leona's right foot has
drifted outside of the camera frame -- not a
big thing, but it is a detail I missed.
Finally, I like how Leona's right eye pops out
of the shadow on that side of her face.
|
|
|
|
|
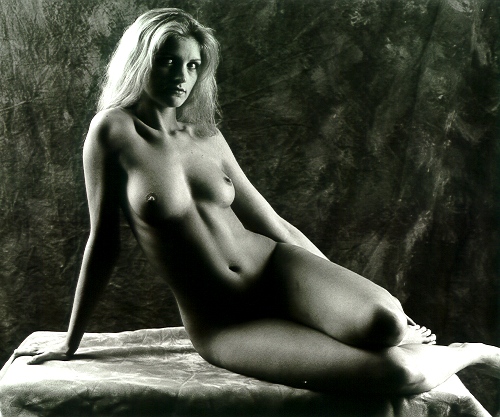
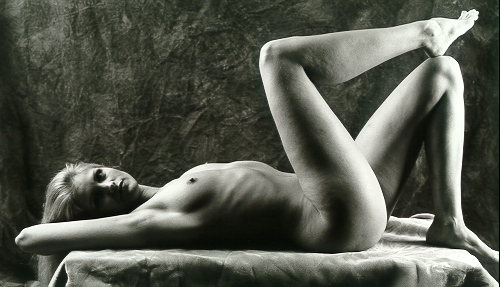
| Lesson
Six -- Cropping: I create 6x7
negatives (2.25" x 2.75"), and
I typically print on 8x10 paper.
With this arrangement, I can do a lot of
cropping & still produce high
quality images. So, if I want to,
I can crop (this image on the left is a
cropped version of the image directly
above).
Now a lot of
serious photographers don't crop their
images at all. Indeed, some even proudly
display the edges of their negatives,
thereby proving that their images are
not cropped. But my first camera
was a range finder (an old Nikon S that
was about as old as I am), so when I
used this camera, I was never sure about
where the edges of the image were.
So, I got in the habit of making sure I
stepped back a bit & included a bit
more than necessary, and then cropped
all the images when I printed
them. It's an old habit, and I
don't really see much point in trying to
break it.
I like this
cropping -- while Leona has some fine
legs, they don't contribute much to this
particular picture. I like the
subtle highlight on Leona's right hip at
the bottom of the picture. Again,
I like how her eye pops out of
shadow. What do you think?
|
|
Here are some
more images from this setup.
And most
importantly, Lesson Zero -- Selecting The Model.
Leona is so beautiful. I especially appreciate
that she is totally natural. I know that
tattoos, enhancements, and body piercing are the
fashion nowadays, but like many photographers, I hate
them. How can a model with any of these ever be
nude? I'm very glad that Leona's lovely figure
is unmarked.
|